
How to Prepare Sushi at Home: A Comprehensive Guide
In order to make your sushi-making experience successful and pleasurable, we will go over ten crucial stages that will help you make mouthwatering homemade sushi that will wow your family and friends.
Compile your ingredients.
Getting all the ingredients together is the first step in preparing sushi at home. Sushi rice, a short-grain rice that gets sticky when cooked and keeps its shape well, is necessary for traditional sushi. To season the rice, you’ll also need salt, sugar, and rice vinegar. Choose from a range of filling options, including cooked seafood (like shrimp or crab), fresh fish (like salmon, tuna, or yellowtail), veggies (like cucumber, avocado, or carrots), and pickles. Sushi rolling requires nori sheets, which are made of dried seaweed. Sushi is also frequently served with pickled ginger, wasabi, and soy sauce for dipping sauces. Because freshness is essential for excellent sushi, make sure you get premium components, particularly the fish. You’ll be set to start creating sushi once everything is ready.
Get the sushi rice ready

Sushi’s rice is its foundation, therefore making it right is essential to getting the ideal texture and taste. In order to assist get rid of extra starch, start by rinsing around two cups of sushi rice in cold water through a fine-mesh sieve until the water runs clear. In order to keep the rice from being overly sticky, this step is crucial. To help the rice absorb moisture, soak it in fresh water for around half an hour after rinsing. After draining, move the rice to a pot or rice cooker and cover it tightly. Add 2 cups of water, bring to a boil or cook as directed on the rice cooker, then lower the heat to low, cover, and simmer for 20 minutes or so. After cooking, leave the rice covered to steam for ten more minutes. Using a wooden spatula, carefully incorporate the 1/4 cup rice vinegar, 2 teaspoons sugar, and 1 teaspoon salt into the warm rice after mixing them until dissolved in a different basin. The rice gets its distinct flavor and sheen from this seasoning.
Get your fillings ready.
Make the sushi roll fillings while the sushi rice is cooking. Make sure the seafood is sushi-grade—that is, frozen to eradicate parasites—if you’re using fresh fish. Place the fish on a sanitized cutting board after slicing it into thin strips that are about 1/4 inch thick. Vegetables should be cleaned and cut into long, thin strips that will slide easily into the rolls. Carrots, avocado, and cucumber are popular vegetable options. Make sure the shrimp or crab are properly peeled and sliced if you’re using cooked seafood. For extra taste, think about including cream cheese or spicy mayo. You may make a range of sushi rolls that suit your preferences once all of your materials are prepared and ready to assemble.
Select Your Style of Sushi

Choose the kind of sushi you want to make before you begin. Maki (rolled sushi), nigiri (hand-formed sushi with a topping), and temaki (hand rolls) are the most popular varieties. When people think of sushi rolls, they usually picture maki, but nigiri is a little pile of rice with a piece of fish or seafood on top. Temaki is a simple, cone-shaped hand roll that can be filled with a number of different ingredients. Knowing the various styles can help you select the best method for your sushi-making endeavors. Maki rolls are frequently the simplest and most fulfilling for novices to start with because they let you be creative and try different fillings.
Maki Sushi Rolling

A bamboo sushi mat is necessary for rolling maki sushi because it helps form the ideal shape. Make sure the nori sheet is horizontally aligned and place it on the mat, shiny side down. Spread a handful of sushi rice (about 1/2 to 3/4 cup) evenly over the nori, leaving approximately 1 inch of space at the top, after wetting your hands with water to keep the rice from sticking. To ensure a uniform coating, gently yet firmly press the rice down. Then, being careful not to overfill, arrange your prepared fillings in a line across the middle of the rice. Tuck the nori’s edge over the rice and fillings as you start to roll the mat away from you. Make sure the roll is tight by continuing to roll with light pressure. Seal the nori roll with a little water once you’ve reached the naked edge. Slice the roll into bite-sized pieces using a sharp, moist knife, making sure to wipe the blade in between cuts to ensure clean slices.
Preparing Sushi Nigiri
A straightforward yet sophisticated choice that brings out the flavor of the fish is nigiri sushi. Wet your hands first to keep the rice from sticking when making nigiri. Using your palms, gently press a small amount of seasoned sushi rice (about the size of a golf ball) into an oval or rectangular mound. The objective is to form a cohesive, compact shape. After you have your rice mound, top it with a slice of the fish or seafood of your choice. For extra taste, you can choose to sandwich the fish between the rice and a tiny dollop of wasabi. To make sure the fish sticks to the rice, lightly press down. Continue doing this until you have produced the required quantity of nigiri pieces. The quality and freshness of the fish used are beautifully reflected in this sushi technique.
Getting Temaki Ready Sushi
Temaki, or hand rolls, are an entertaining and engaging method to eat sushi that’s ideal for parties or informal meals. To make temaki, lay a sheet of nori on your hand or a spotless, level surface. Spread a little amount of sushi rice over one half of the nori, leaving the other half uncovered, after wetting your hands to prevent sticking. Arrange your preferred fillings, such as cucumber, avocado, and shrimp, on top of the rice. To roll, fold the nori over the fillings to form a cone, starting from the side covered with rice. To keep the shape in place, roll the cone and tuck the top in. Temaki is best eaten right away because sitting for too long can cause the nori to get mushy. Sushi lovers enjoy this technique because it fosters creativity and individuality.
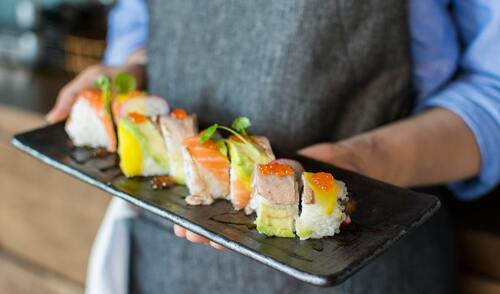
Providing Sushi
When your sushi is ready, it’s time to present it in an elegant manner. For a visually appealing presentation, arrange your temaki, nigiri, and sushi rolls on a plate or bamboo board. Serve the sushi with pickled ginger as a palette cleanser, wasabi for those who like a spicy kick, and tiny plates of soy sauce for dipping. To improve the presentation, think about adding fresh herbs, such cilantro or shiso leaves, as a garnish to the tray. For an added touch, you can also use edible flowers or vibrant vegetables. Sushi is enhanced when it is served properly, allowing your visitors to appreciate the creativity of your dishes.
Tips and Etiquette for Sushi
It’s crucial to comprehend some fundamental sushi etiquette and advice in order to enjoy sushi to the fullest. Nigiri can be eaten with your fingers, however sushi is traditionally eaten with chopsticks or your hands. To avoid the rice soaking too much of the soy sauce, dip the fish side of the nigiri into it instead of the rice. It’s totally fine to dip rolls in soy sauce while eating them, just watch how much you do. You can also enjoy wasabi anyway you like; some people like a small amount on the sushi, while others like to blend it with the soy sauce. Above all, enjoy the flavors and textures of your homemade sushi by taking your time and enjoying every bite.
Keeping Sushi Leftovers Safe
In order to preserve its freshness, it’s crucial to keep any leftover sushi carefully. Although sushi is best eaten the day it is prepared, if you must preserve it, wrap each piece closely in plastic wrap or put it in an airtight container. Although the rice will lose its perfect texture after a day, keep the sushi refrigerated. Sushi should not be frozen since this will affect the texture of the rice and fish. For optimal flavor and safety, eat chilled sushi within 24 hours of being ready to eat. Instead of storing leftover fish or veggies with cooked sushi, think about incorporating them into salads or other recipes.
In conclusion
Sushi making at home may be a fun culinary adventure that promotes individuality and creativity. You can make a range of sushi dishes, from sophisticated nigiri to traditional maki rolls, with confidence if you follow this detailed tutorial. In addition to teaching you basic cooking techniques, the experience broadens your understanding of sushi-making techniques. Take pleasure in the preparation and relish the delectable outcome, whether you’re throwing a sushi party for your friends or just enjoying a peaceful supper at home. As you gain experience, you will hone your craft and create your own distinctive sushi dishes, transforming your kitchen into a sushi paradise that honors the tastes of this well-liked Japanese dish.